Tag Archives: recipe

Spatchcock BBQ Chicken

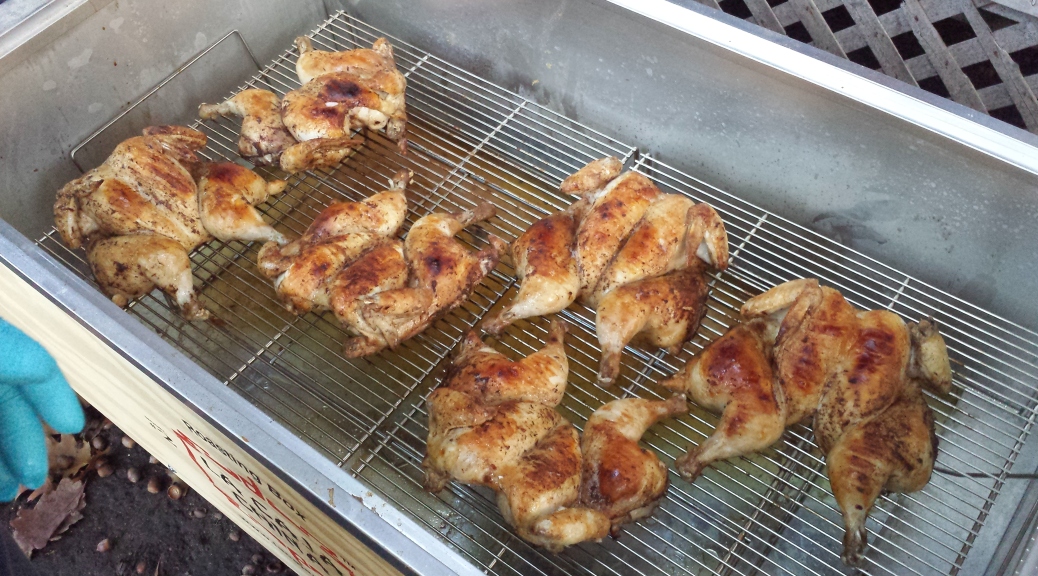
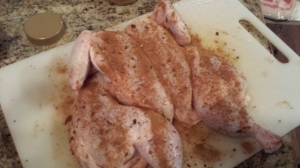
SPATCHCOCK! No, that’s not a dirty word or an insult or anything along those lines, this isn’t that type of blog.  Spatchcock is simply the term used to describe a chicken, turkey, or any other type of whole bird that has been split along the spine (removing the spine) to allow it to open up and lie flat.

20141025_111557

I love whole chickens. Whole chickens give you the ability to prepare both white and dark meat at the same time while the bone and skin give the meat a huge boost in flavour.

The idea behind spatchcocking a chicken is it allows you to cook the chicken fully on the bone as you would with a whole chicken but much faster. The body cavity (where we usually jam stuffing) insulates the bird during cooking.  This insulation slows down the cooking process and also makes the bird cook unevenly.  Spatchcocking removes this cavity.   Birds are weirdly shaped with big pieces of meat intertwined with much smaller pieces.  This process helps the breast and dark meat sections to cook at relatively the same pace.

To start, you are going to need a whole chicken, a very sharp knife or kitchen scissors and a cutting board.  Safety tip; use sharp knives!  People are afraid of sharp knives as they think they are going to lop off a finger or an entire appendage.  If you are careful, a sharp knife is actually safer than a dull knife.  Dull knives force you to push harder than needed, which increases the chance of the knife slipping and cutting you.  If your cutting board has a tendency to slide around while cutting with it try putting a slightly damp kitchen towel underneath it.  This should stop the sliding.

20141025_111535

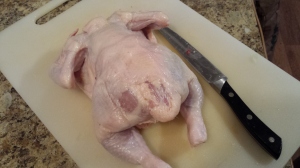
Place the bird so the spine is resting on your cutting board.  Either with your knife or your scissors cut up either side of the spine and remove. **Please note that the chicken in the picture above is actually the wrong way up.  Please do not attempt to cut it in this manner unless you are using scissors.**

20141025_111548

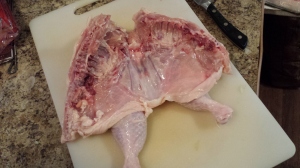
Note: in the above picture the spine is still attached on the left side.

20141025_111557

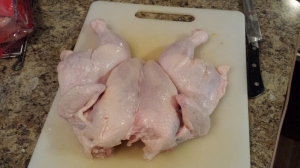
Now that the spine is gone take both hands and push down firmly on both breasts at the same time.  You will probably feel and hear some snapping as this will break some of the rib bones and allow the chicken to lay as flat as possible.

Season the chicken liberally on both sides with your favourite BBQ Seasoning.  I like to do this the day before I cook the bird or at least a few hours ahead.  This allows the spice blend to really penetrate the meat.

20141025_112529

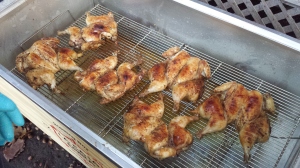
To cook, preheat one side of your BBQ to medium heat but leave the other side off. If using charcoal, have one side of the grill with a bed of coals that have fully lit and are fully grey, then wait 10 minutes, no charcoal at all on the other side.  Cook skin side up for 10 minutes with the lid closed.  Flip and then cook for another 10 minutes skin side down with the lid closed.  Now, place the chicken on the cold side of the BBQ and cook for another approximately 20 minutes with the lid closed or until the breast meat is at 165 degrees.

20141025_180140

Enjoy!

Spatchcock BBQ Chicken

  • Servings: 4-6
  • Difficulty: Easy
  • Print

Ingredients

  • 1 whole chicken
  • BBQ Spice
  • Kitchen Scissors or a sharp knife

Directions

  • Use kitchen scissors or knife to remove the spine by cutting up either side.
  • Place both hands on the breasts and push down flattening the bird.
  • Season liberally on both sides with BBQ Spice
  • Place in a ziplock bag and allow to sit for up to 24 hours
  • Preheat one side of your grill to medium heat and leave the other side off
  • Place the chicken skin side up directly over the heat and cook for 5-10 minutes with the lid closed.
  • Turn chicken over and cook skin side down for another 5-10 minutes with the lid closed.
  • Move chicken to the indirect side of grill and cook for another approximately 20 minutes with the lid closed or until the chicken is 165 degrees in the breast meat.
  • Cut chicken into individual pieces (breast, thigh, drum, wing) and serve.


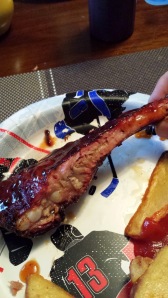
Chicken Drumsticks

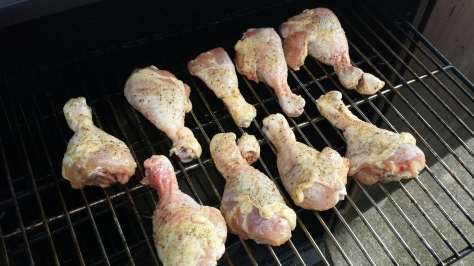
Chicken Drumsticks is one of my youngest boy’s favourite items out of the smoker. He asks for them from time to time and of course his Dad takes any chance he can get to play around on the smoker.

image

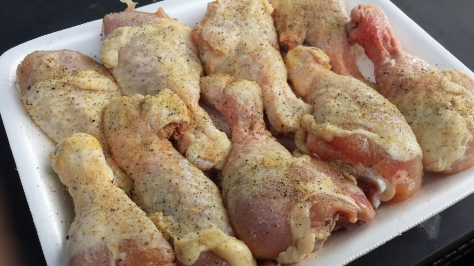
I use a simple rub of black pepper and seasoned salt on them.

image

Get the smoker running at 275 degrees and add a couple chunks of wood. I used hickory.

Place the chicken in the smoker.

image

Cook the chicken until it reaches about 180 degrees internal temperature. This will usually take about 45 minutes with medium size drumsticks. Once we reach 180 degrees we need to deal with the skin.

One of the issues with cooking skin-on chicken in a smoker is the texture. If you don’t cook it right it turns into rubber and is not pleasant to eat. So, at 180 degrees I will remove the water pan and wood tray from the smoker so the chicken receives direct heat. I also crank the temp up to full blast. This is a huge benefit of a gas smoker as this process is easy and fast. You could do the same with charcoal by removing the water pan in your smoker and opening up the air vents to get a higher temperature it will just take longer for the coals to get to full whack.

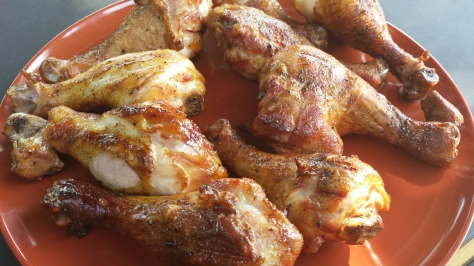
Cook the chicken at high temp for about 10 minutes, turning the chicken often. You will see the skin brown up nicely. You won’t get crispy skin but you will get bite through skin that tastes great.

At this point you can add sauce if you like or just serve as is. I personally like it with no sauce.

One thing to be prepared for however is pink meat. Smoke turns meat pink, there is no way to avoid it.  Whenever people see pink chicken they get nervous. You didn’t screw it up. This is why we use a meat probe. If you hit 180 degrees and then blasted it for 10 minutes over high heat it will be cooked. I promise.

image

Serve and enjoy!

MD

Pulled Pork

image

Pulled Pork is a great BBQ meal. It’s easy to do, is relatively cheap and tastes great. The popularity of pulled pork has sky rocketed in Ontario in the last few years. You can find a version of it in tons of restaurants now and lots of people making it in their crockpots or ovens. I always make mine in my smoker. The smoke makes it for me.  The only drawback to pulled pork (if there is one) is that it is a time commitment with the cook lasting usually 12-16 hours.

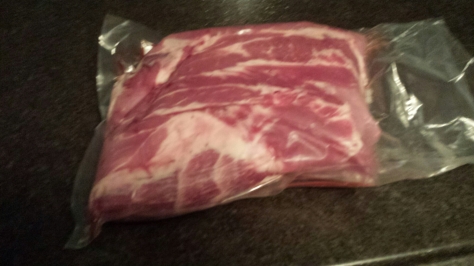
The traditional cut of meat you use for pulled pork is called a “Boston Butt” which is taken from the shoulder of the pig.  I order mine from Kohns in London. Never been disappointed in the quality. When you unwrap it you will notice a lot of fat on one side of the pork. This is called a “fat cap” and we want to keep it on. The only fat I would trim is any hard fat. If it feels soft leave it. This will help with moisture and flavour during the cook.

image

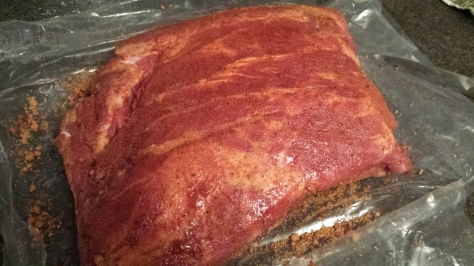
You will need a dry rub,  sauce and if you choose to do it, an injection. Injections are a great way of putting flavour way down deep in a large cut of meat. You can use anything you like in an injection. A good one for pork is to mix some pineapple juice with some soy sauce and hot sauce. 3 parts juice, 1 part soy and as much hot sauce as you like.
I didn’t use an injection on this pork but I do from time to time.

Start by injecting your pork and dry rubbing it about 6-12 hours prior to the cook. Put in the refrigerator and let get happy.

image

Fire up your smoker to 230 degrees. I used my Masterbuilt for this. Add wood to the fire (I used hickory) and wait for the first signs of smoke. I use wood chunks as they smoke longer. Start with 3 good chunks.

Put the pork in the smoker fat side up.

image

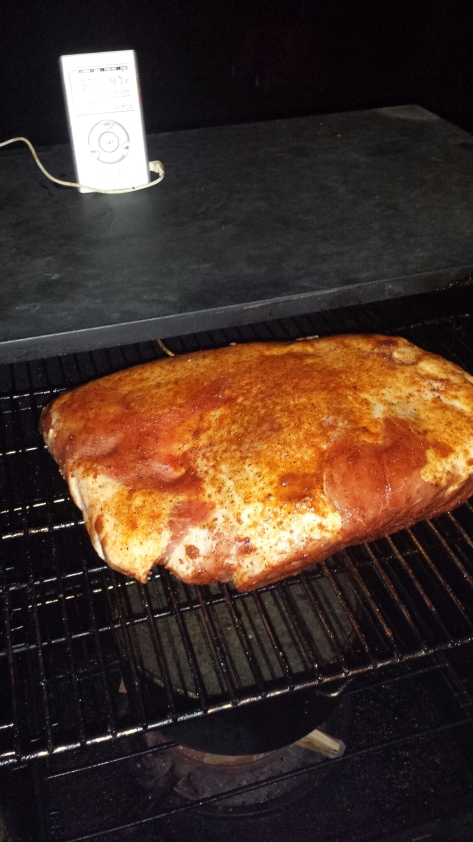
You can see in the above picture that I have a meat probe in the pork. This allows me to monitor the progress of the pork during the cook.
Keep adding wood as smoke dies out until the pork hits 140 ish. At this point the amount of smoke flavour the pork will take in will be miniscule so I don’t bother wasting the wood chunks.

The magic number I personally look for is 193 degrees internal temperature. This could take anywhere from 12 hours plus. It depends on the size of your pork. They are usually around 8-10 pounds.

One thing to be prepared for. At about 145-165 degrees the temperature of the meat is going to stop climbing and sit there for what feels like forever. This can even be hours. What is happening is at this temperature range the internal fats and connective tissues begin to melt and break down. Once this process is finished the temperature will start to move again. Trust the process. Don’t crank the temp. Just look away or go do something else while this happens. Staring at the meat thermometer won’t make it move, trust me, I’ve tried.

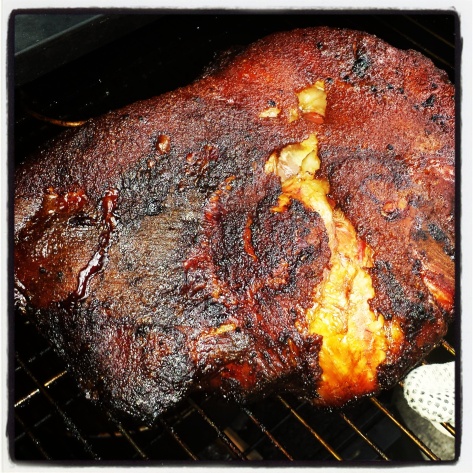
At 193 degrees you want to remove from the smoker. Should look sorta like this.

image

If it’s darker than this, that is normal. In fact I was a little disappointed this one wasn’t darker actually.  It’s not burnt. It’s called “bark” and is some of the tastiest parts.

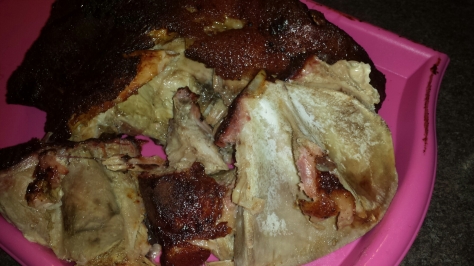
Here is an easy way to tell if it’s done properly if you don’t have a meat thermometer. There is a large bone in these roasts. You should be able to grab the bone and just pull it out with almost no resistance. If it comes out easily and clean you are where you want to be. If it won’t come out put it back in the smoker.

image

See the bone?

Break apart into large chunks and let sit a few minutes. It’s 9000 degrees right now.

Pull the pork by hand. Discard any chunks of hard fat or any connective tissue you find. Keep in mind however that you do want most of the fat to stay. It’s good!

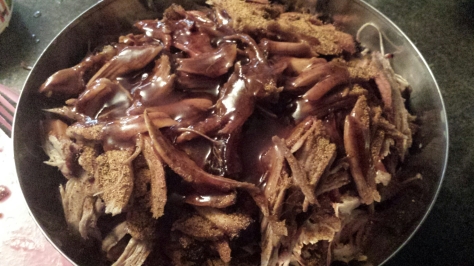
I always add a bit more dry rub into my pulled pork and my sauce and mix well.

image

image

image

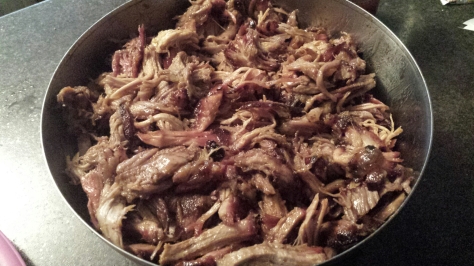
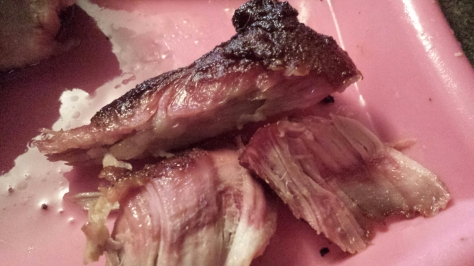
The pink is not undercooked meat. That is what the smoke does to the meat. It’s called a “smoke ring” .

Serve with coleslaw and buns to make awesome sandwiches!

Enjoy!

Onion Bombs

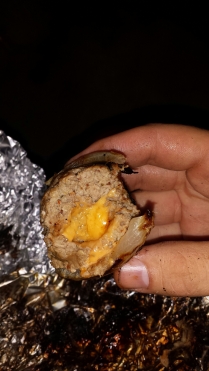
Now I need to be completely honest here. These are not my original idea. If you search online you will see loads of recipes for these things. But when I saw them I knew I had to try them. I did a couple of my own things like the cheese and sauce.
image

My plan is to make a sausage mixture with my own flavours, jam a piece of cheese in the middle, stick it in the onion, wrap it in foil, toss in a campfire and see what happens.

How could this suck?!

I start by making my sausage mix.
image

image

For this you are going to need the following:

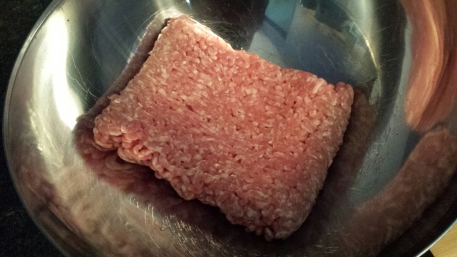
– 1 lb. Ground Pork
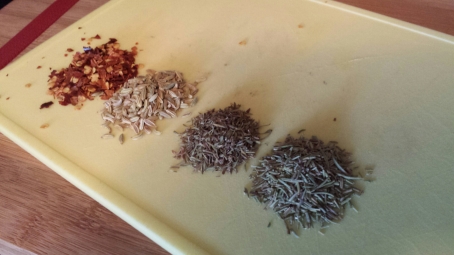
– 1 Tablespoon each of fennel, thyme, rosemary, chili flakes
– 1 Tablespoon Worcestershire Sauce
– 1 Tablespoon Dijon Mustard
– 1 egg
– 1/4 bread crumbs
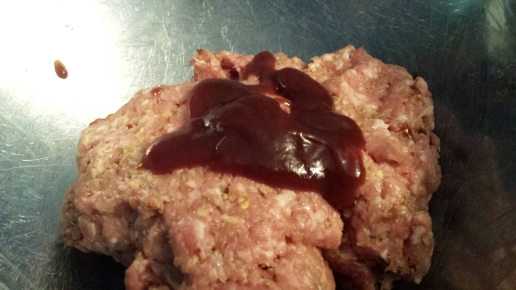
I also decided at the last minute to add a couple of tablespoons of BBQ sauce.
image

Mix this all up and set aside.

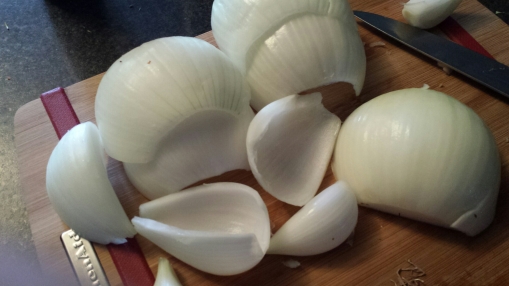
Peel an onion, cut in half from top to core and separate into shells.
image

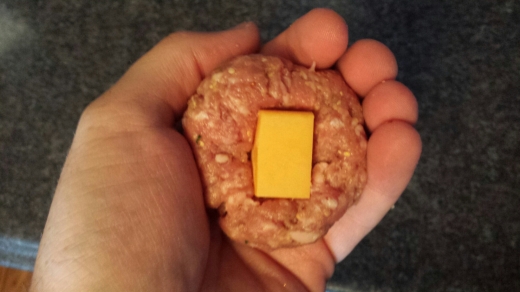
Create a ball of sausage meat and jam a chunk of cheese in the middle, then finish the ball to seal the cheese in.
image

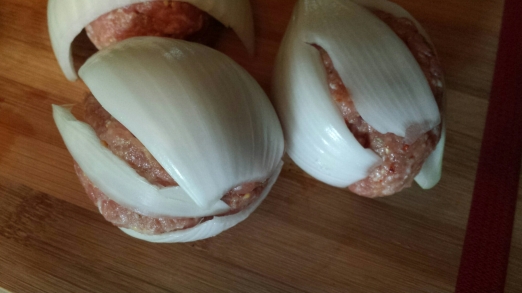
Put the meat and cheese ball inside of two halves of onion.
image

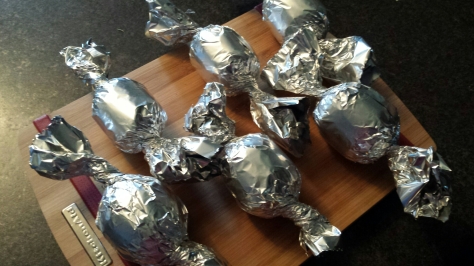
Wrap in heavy duty foil. I actually triple wrapped them.
image

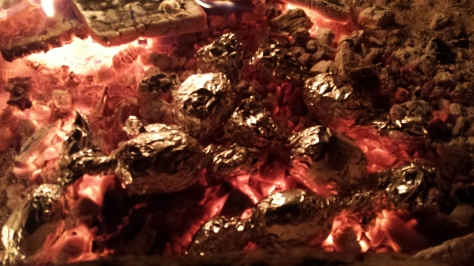
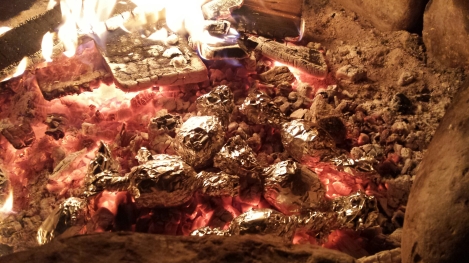
Get a campfire going and place in a nice bed of coals. You want to flip them after 10 minutes and cook for another 10 minutes.
image

Pull them out and let sit for 5 minutes.
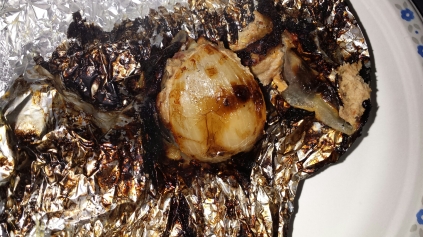
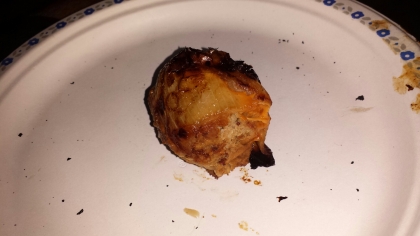
Open the foil and eat!
image

image

image

Enjoy!

MD

BBQ Spice Rub

A good spice rub can be a beautiful thing.  It can compliment meat, bring out flavours in sauce and also be a factor in the texture of the meat as well.

You know those nice crispy dark bits around the outside of a piece of meat? The pieces that taste so good?  You can probably thanks a spice rub for that.  Often times this lovely crust in the BBQ world is referred to as “bark” and is a crucial component in the competitive BBQ world.

8c522-20140802_170100

Just like BBQ Sauces there are literally unlimited combinations you could put together to create a rub.  Head to your closest bulk barn or grocery store, head over to the spice section, close your eyes, spin in a circle and randomly point at 4 or 5 things and you just invented a new rub.  It really can be that simple.

There are a few basics to spice rubs we need to consider; mainly the type of meat we plan to use the rub on.  Chicken and pork traditionally have sweeter and less salty rubs placed on them.  On the flip side of that the flavour of beef can stand up quite well to a good amount of salt.   Of course there is nothing saying you can’t figure out a good spot right smack in the middle of the salt world so your rub is an all purpose rub good on just about everything.

Let’s take a look at some of the major components of a good rub.

SALTS

There are TONS of salts to choose from on the shelves of grocery stores and speciality shops these days.  Everything from regular table salt to Danish Viking-Smoked Sea Salt.  Think I made that one up? Google it, it’s real.  Here is what you really need to consider when choosing a salt.  How “salty” do you want it and how big do you want the chunks.

Not all salts are created equal.  If you use products like Kosher salt and Sea Salts that are bigger chunks the food usually tastes less salty.  The reason?  They are larger and a inconsistent size so they take up more space than a fine ground table salt.  SO, if you use a tablespoon of Kosher Salt it will have less weight than a tablespoon of table salt.  Check your salt packages, they list sodium per weight usually.  Therefore less weight equals less sodium which is what gives salt it’s “salty” taste.  Did that make sense?  Watching your sodium intake? Use Kosher or large grain Sea Salt.

From a purely texture standpoint there are benefits to having a nice fine ground salt, as well as big chunks of kosher salt.  Finer grains are nicer for rubs that you hope melt into the flesh and disperse throughout the meat it touches. Fine salts also usually produces a nice soft exterior on the meat as salt dissolves fast and doesn’t draw out as much moisture.  Large chunks however will help if you want to actually rub the meat down to help tear the top layer of meat fibres and to build a crust. Larger chunks of salt will dissolve slower because they are bigger and therefore will draw out more moisture.  Drier meat gets crispier.

Here is another big factor, cost.  Remember that Danish Viking business?  $25 for 3 ounces.

SUGARS

What to use? White sugar, brown sugar, raw sugar… Almost as many choices as salts.  Let’s cover the 2 most common.

White sugar has a more up front sweetness.  It will give rubs an almost candy like taste if enough is used.  Because the sugar is also finely ground in most cases it will melt quickly.

Brown sugar has a deeper, richer flavour.  The brown in brown sugar is due to its Molasses content.  Light brown sugar just has less molasses and will give it a milder flavour than the more upfront flavour of full on dark brown sugar.  One downside to brown sugar is the amount of moisture in it.  It has a tendency to clump up in rubs.

Demerara and Turbinado Sugar are often the go to choice in BBQ rubs.  They are dry like a white sugar, have the flavour of brown sugar and are large crystals which gives the benefit of a slower melt which lessens the chance of burning while it cooks.  Sugars like brown sugar and white sugar have a tendency to burn under high heat cooking. The large crystals are also favourable for rubbing meat to help with the tearing of surface fibre, just like kosher salt.

PEPPER

My favourite ingredient in all rubs.  I love pepper.  Black pepper, white pepper, cayenne pepper, chilli pepper, you name it.  The benefit of pepper is that it provides some heat.

Heat helps to wake up your taste buds and enhances the overall flavour of the meat and rub.  Some meats can handle more pepper than others.  Beef loves pepper.  Chicken likes pepper.  Fish and pepper are old school buddies, they like a little of each other but too much would ruin the friendship.  These are not hard and fast rules however.  If you wanna pepper the crap out of your perch fillets go for it.  There are no rules in cooking.  If you like it, do it.

You will usually see ground black pepper called for in BBQ rubs.  You will also usually see a varying amount of cayenne.  I would say these are the 2 most common.  However, white pepper can be nice if you really want to bump up the heat as well.  Use what you like.

BASE FLAVOURS

These spices are what bring all the other parts of the rub together and carry the rub.  These spices are usually fairly mild in flavour so we can use a lot of it.  The big 2 are chilli powder and paprika.  Usually in close quantity to our sugar amount they help to give an underlying base note to our rub.  Chilli powder and paprika are not the only ones you can pick from.  Cumin would be great in a southwest inspired rub. Use your imagination here.

STAR FLAVOURS

These herbs and spices are what makes your rub what you intend it to be.

Usually these spices are used in small amounts as they could be overpowering if used in large quantities.  With these spices you can take your rub anywhere in the world you want to go.  Add some cumin, turmeric, ginger,ground coriander, clove, etc. and you have a curry style rub.  Add cinnamon, nutmeg, allspice, clove, thyme and you are in Jamaica with a Jerk inspired rub.  Oregano, basil, parsley, garlic powder, chili flakes and we are in Italy.  I think you get the point.  You can do anything here.  Think about the prominent flavours of the type of food you want to create and add them into your rub.

PAIRING WITH SAUCE

Make sure your rub works with the sauce you intend to use, or, let the rub speak for itself and don’t use a sauce.  Usually I try to use similar spices in my  rub as I did in my sauce.  Nothing goes better with ginger than ginger and there is no reason I couldn’t use it in both the rub and the sauce.  Another option is to figure out what you want the overall flavour to be and have the sauce and rub compliment each other rather than mirror each other.  For example, if I want a sweet and spicy combo, make a sweet sauce and use a spicy rub.  They may not have similar ingredients but will match up and play nice together.

BBQ RUB RECIPE

Here is a recipe for a fairly basic BBQ Rub.  Take this base and play with it.  You can always make up a big batch of the base and each time you make a new BBQ item take out a cup of base rub and jazz it up with different flavours each time.

BBQ RUB

Good on all types of meat.

  • 2 cups turbinado sugar (or brown sugar)
  • 1/3 cup kosher salt
  • 1/4 cup chilli powder
  • 1/4 cup paprika
  • 3 tablespoons ground black pepper
  • 1 tablespoon cayenne pepper
  • 1 tablespoon onion powder
  • 1 tablespoon garlic salt
  • 1 tablespoon parsley flakes
  • STAR FLAVOURS OF YOUR CHOICE!

Combine all ingredients in a bowl and mix well.  Store in an airtight jar or ziploc bag and keep in a cool, dark location.

Enjoy!

MD

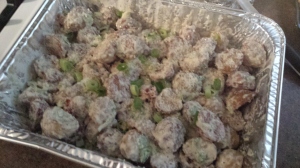
Roasted Potato Caesar Salad

Yup, you read that right… Caesar Salad made with roasted potatoes.

2 words to describe it… Awe Some.

20140809_192109

Everything you love about Caesar Salad, combined with everything you love about roasted potatoes.  Here’s another great thing about this recipe; it’s super quick to make and ridiculously easy.

This is another one of our BBQ Sides that I get a lot of requests for.  Give it a shot!

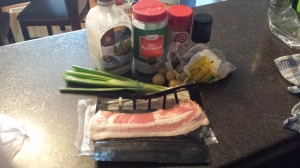
Here is what you are going to need for this recipe:

  • 3 lbs. mini potatoes cut in half
  • 8 slices of bacon
  • 3 green onions (green part only)
  • 1/2 cup Parmesan cheese (yes, I used the crappy stuff in the shaker, so what!)
  • Your favourite Caesar Salad Dressing (as much as you like)
  • olive oil (enough to coat the potatoes)
  • salt (to taste)
  • pepper (to taste)

20140809_165922

I start by preheating my grill (or oven) to 425 degrees.

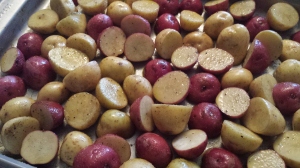
Cut the potatoes in half and throw on a baking sheet.

20140809_165323

Drizzle with enough oil to coat the potatoes but it shouldn’t be swimming in oil.  Season potatoes liberally with salt and pepper.

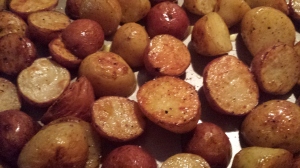
Toss in the BBQ and shut the lid (or in the oven) for about 30.  Every 10 minutes you will want to shake the tray and flip the potatoes over.  We want them all to be nice and golden brown on both sides and soft in the middle.  Use a fork to test the doneness, or even better do what I do; EAT ONE!  When you like them, they are done.

20140809_172947

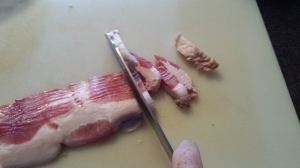
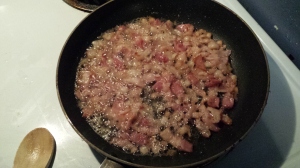
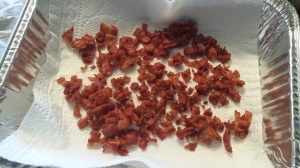
Meanwhile, cut up the bacon into small strips. Place in a pan and cook until nice and crispy. Once the bacon is cooked, remove from the pan and set on paper towel to drain.

20140809_121128 20140809_121716  20140809_170618

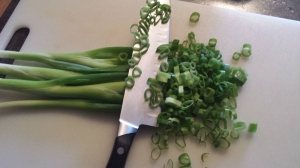
Slice the green onions into small rounds.

20140809_165553

Throw all ingredients in a foil tray if going to a party for easy clean up, or in a nice big bowl and mix to combine.  I didn’t put an amount on the dressing.  If you like a lot of dressing use a lot.  If you like a little, take it easy with the dressing.

And voila you are done and ready to sit down with your friends and eat!  Pretty easy right?!

20140809_192109

Enjoy!

If you like what you see, please hit that share button and also sign up to follow the blog!

MD

Chicken Burger

So I wanted a Chicken Burger for lunch today.  When I get this craving the last thing I do is hop in the car and head to the Golden Arches or go to the freezer.  I reach right for my trusty boneless skinless chicken breast.  It tastes better, is quicker than the frozen kind and you get WAY more meat in your sandwich, trust me.

The big difference between cooking the breast for burger destiny as opposed to just on our plate with some sides is in the prep.

I want my chicken to be burgerish.  Now in its original state it’s not, and would require more cooking over a lower temperature than we cook most burgers.  It’s lunch, I’m looking for something quick that I can throw over high heat to get it done as fast as I can.

So I pounded the snot out of it.

I used the flat side of a meat mallet to flatten the whole chicken breast to about a 1/2 inch.  This does 2 things.  It will make it cook substantially quicker since it is thinner and it will also make sure it all cooks evenly.  Plus, more surface area gives us more space for seasoning and char.

If you don’t own a mallet, no biggie, use a pot, frying pan or even a wine bottle.

 Notice I put the chicken in a ziploc bag before I started beating it into submission.  This helps protect the meat from tearing as I hit it.  Another trick is to take your time.  You don’t have to get it perfectly flat in 3 hits.  This probably took a good minute of pounding.

Now I just brushed on a little olive oil on each side and seasoned with Lowry’s Seasoned Salt and ground black pepper on both sides.

Off to a preheated grill set to Maximum (High).

Follow the same principals here as in any other meat on the grill recipe.  Try to only flip it once and once it’s on there leave it alone until it is ready to flip.

Because we pounded it out so thin it will only take about 3-4 minutes a side.

Flip halfway through cooking and continue to cook on the other side.

When I flipped it this is when I took the opportunity to grab a nice seasame seed bun and throw it on the grill to toast up as well.  Be careful, we are cooking on high, we don’t want that bun to burn.  Use your top rack if you find it getting too toasted too quickly.

 Once the bun is toasted and the chicken is cooked, it’s off to the kitchen.

Time to build our burger.  Sliced tomato, iceburg lettuce, Mayo and some pepper is all I did here.  I cut up the chicken into pieces that would fit on the bun.  Plus it looks massive when you pile the chicken up like that 😉

And voila, it’s lunch time.  Total time from start to finish, 15 minutes.

Enjoy!

MD

BBQ Sauce

BBQ SAUCE

A good BBQ Sauce can make good BBQ great and a great BBQ Sauce can make great BBQ amazing.  The trick? Realizing that BBQ sauce is a personal taste thing and not everyone will like the same sauce.  The solution? Experimentation.  Try a sauce and see what everyone thinks.  The best advise (in my opinion) I give anyone on topics like this is to ask people who you know won’t sugar coat their words or their opinions on your creations.  Guess what, if I ask my Grandmother what she thinks of anything I make, she’s going to “love” it. Great for the ego, but not great for finding something that works.  We should be working towards creating a sauce that will have enough layers of flavour that your whole family will find something they like in it.

For example…If I make a sauce that is nothing but all sweet flavours, someone like myself who prefers savory and spicy flavours probably wont enjoy it.  If I make a sauce that is nothing but pure heat, then anyone with a sensitive tongue is going to be looking for the closest faucet to wash the sauce off.  Now, if I make a sauce that is sweet, has a hint of savory elements and has a little kick of heat at the end, I’ve found a winner for my house.  Your house, your flavours.

Here is the basics.  You need to decide on the type of sauce you want to make.  You can Google “BBQ Sauce” and you are going to see terms like Kansas City Style, Memphis Style, Carolina Style, Texas Style, etc.  The differences in these sauces is mainly what they use as their base, or main ingredient.

There are 3 main bases that most BBQ sauces start from.  Tomato or Ketchup, Vinegar and Mustard.

Choose the base you think will work for you.

THE BASE

Now take this nugget of information as a hint on where most people in Ontario (and Canada for that matter) find their tastes directing them. Go to the grocery store and hit the BBQ Sauce isle. Try to find ANY sauce that isn’t a tomato based sauce.  See any?  Probably not.  The people in our neck of the woods traditionally are suckers for thick, mahogany red, sweet and sticky BBQ sauces.  Sure, you can get garlic, spicy, honey, whiskey, etc. but guess what they all have in common?  Red. Sweet. Thick. Tomato.

Here’s a rough guide to your choice…  Tomato for almost all sauces including those you put on the meat as it cooks so it gets nice and caramelized and sticky.  Vinegar if you don’t like sweet at all and want something “zippy” and more of a finishing sauce you mix into the meat at the end or dunk your meat in as you eat.  Mustard if you are looking for a more savory sauce.  Now this is REALLY rough.  You can definitely make a sweet vinegar sauce or a savory tomato sauce.

Here’s another thing to consider.  Pick up any tomato based sauce in the grocery store and look at the ingredients.  Know what you are gonna see? Vinegar.  I almost guarantee it.  You don’t have to limit yourself to one and done.  Mix and match!  And don’t be afraid to go beyond straight Heinz ketchup, White Distilled Vinegar and French’s Yellow Mustard.  There are plenty of varieties of each base out there.  Open up your mind to Cider or Rice Wine Vinegar, Grainy or Dijon Mustard, etc. You will be happy you did.

Now that you have your base, decide what you want it to taste like.

Want it sweet?  Here are a list of things you could add to the sauce to sweeten the works up:

Sugar (brown, white, raw, maple), Honey, Maple Syrup, Corn Syrup.  Those are the usual culprits.  But don’t be afraid to think outside of the box.  Have a few peaches lying around that you haven’t eaten yet?  Cook em up, blend them and throw them in!  I’ve seen TONS of fruit based sauces.  Blueberry, Pineapple, Peach, Mango, etc.  Have something else in mind? Use it!  In the words of the Urban Peasant, James Barber: “If you like it, put it in. If you don’t, leave it out!”.


AROMATICS

These are ingredients that are used to build a flavour base in sauces, stews, soups, whatever.  In the BBQ sauce world onions and garlic reign supreme as well as some strong herbs like basil, oregano, rosemary, thyme.  These are only a few of literally hundreds you can choose from.  In most sauces you won’t be able to pin point the onion flavour, or the garlic, or the other vegetables and herbs used to build that base but trust me, you would notice something was missing if I lined two sauces up side by side and one didn’t have them in there.  Choose the aromatics that you think will go well with the base you picked and the overall goal of the sauce.  Want something sweet?  Caramelize a sweet onion until they are nice and brown and full of sweet flavour as your base.  Want something savory? Just sweat the onions until soft, toss in some power herbs like rosemary and thyme.  Want some heat?  Pull out the jalapenos or chipotle peppers.  The choices and combinations here are limitless.

SPICES 

This is where you take the sauce and truly customize it.  Some spices will instantly transform your sauce from generic to truly unique.  Because of this you need to be a bit careful in what you add but you also can’t be afraid of adding enough to make it stand out.  For example, if I want to make a curry style BBQ sauce but only add a 1/2 teaspoon to 4 cups of sauce you might notice it but probably not as a main flavour.  Now, in my opinion, if you are making a curry BBQ sauce it better taste like curry.  Toss in a couple tablespoons.  Want a sweet and savory sauce?  Cinnamon, clove, mace, ginger, etc.  Spicy? Cayenne Pepper, Black Pepper, Red Chili Flakes…  Mix and match here.  The place where you need to be careful however is in the quantity.  Something like 2 tablespoons of cinnamon in a couple cups of sauce will make everyone think they are eating a Cinnabon.  I think you get the picture.

Experimentation here is key.


OTHER FLAVOURINGS

The sky is the limit here.  This is where you can add Whiskey, Tequila, Rum, Beer any type of booze.  Apple, Pineapple, Peach or any fruit juice.   Coca-cola, Dr. Pepper, Root Beer, any soda.  Again.  If you are trying to impart a flavour, go for it.  Don’t be shy!

Hot and Cold.  Meat or No Meat. The Meat Itself.

Here is something that blew me away when I realized it.  It blew me away because I didn’t realize it sooner and made me feel stupid for not.  Your sauce will taste different cold than hot.  It will also taste different on meat than on your finger or a spoon.  Simple right?  Took me a long time to figure this one out.  Try taking a big whiff of a sauce as you cook it with a good amount of vinegar in it.  It will take your breath away.  Let it cool and put it on some pork and it will be mellow and delicious.  Take a small spoonful of a sauce you are trying to make spicy.  Not that spicy yet?  Let it cool and meld into the sauce for a couple hours and poof, it will blow your head off.    Making a sauce for a beef roast you have on the rotisserie?  Why test it on a piece of chicken?  Making a nice mustard based dipping sauce for the ham you have in the oven?  Have a couple slices of ham ready to go to drip some sauce onto to test it out and see what it needs.  Morale of the story…If you are creating a sauce, make sure you test it out in the application you plan to use it.

Now, for the people who have eaten our BBQ Team’s food in the past and have literally begged us for the recipe.  I’m sure some of you saw this post and were hoping against the odds that I was about to spill the beans on our BBQ Team’s sauce.  The one we have won championships with.  The one that got us our invitation to the Jack Daniels World Championship Invitational BBQ.  The one that only 3 people on the planet knows how to make.  I obviously won’t be sharing that, sorry!
But here is what I can tell you.  It’s ketchup based.  Sweet with a bit of heat.  That’s all you’re getting.

Want a recipe that most people will like?  Here is one that will hit a lot of taste buds out there and work as a very good all purpose sauce for all meats.

If you have a question about sauces in general or the sauce below, please do not hesitate to ask!
MD

Dr. Pepper Sweet and Spicy BBQ Sauce

INGREDIENTS

THE BASE

2 cups Ketchup

2/3 cup Brown Mustard

2 Tablespoon Apple Cider Vinegar

(look all 3 bases!)

2 cup Brown Sugar (the sweetener)

AROMATICS

6 cloves Garlic, Minced

1/2 a Sweet Onion, Caramelized

2 Chipotle Peppers Packed In Adobo (want it spicier? add 3 or 4 or 5…its up to you)

SPICES

1 teaspoon ginger

1 teaspoon cinnamon

salt and pepper to taste

OTHER FLAVOURINGS

1 Tablespoon Worcestershire Sauce

2 cans Dr. Pepper

INSTRUCTIONS

  1. Place all of the BASE ingredients in a big pot and bring to a gently boil over medium high heat. Make sure you stir this stuff constantly.  It will burn if you don’t.
  2. In a frying pan, caramelize onions over medium heat until dark brown and sweet.
  3. Place the onions and the rest of the aromatics in a food processor or blender and puree. Add to the pot with the BASE ingredients.
  4. Add in your SPICES and OTHER FLAVOURINGS
  5. Continue to gently boil until the sauce reduces and thickens up.  About 30 minutes.
  6. Because of the ketchup there is probably a gross looking red film on the top of the sauce.  Spoon this off and throw out.
  7. Let cool completely and bottle.
  8. Put on your favourite meats and enjoy!